

Burnt Basque Cheesecake
I’m not a huge baker, but lately I’ve been enjoying trying new dessert recipes. Maybe it was the holiday season that got me in the mood. Desserts can sometimes be challenging to get right but they are pretty simple to make. It’s always nice to have a sweet treat throughout the week that you made yourself!

I’m not a huge baker, but lately I’ve been enjoying trying new dessert recipes. Maybe it was the holiday season that got me in the mood. Desserts can sometimes be challenging to get right but they are pretty simple to make. It’s always nice to have a sweet treat throughout the week that you made yourself! I’ve had a Burnt Basque Cheesecake a few times in the last year even though it’s not a common dessert you find at restaurants. I had been wanting to test it out myself for a while. Although I generally like graham cracker crusts, the burnt edges of this crust-less cheesecake is different. It’s light and sort of cake-y. I thought my version was pretty good! You can freeze it too if you don’t want to eat the entire cheesecake on your own or you can even gift it.
BURNT BASQUE CHEESECAKE (serves 6-8)

Ingredients:
· 18 oz cream cheese
· ¾ cup sugar
· 3 eggs
· ¾ cup of heavy cream
· 1 tsp vanilla extract
· 3 tbsp flour
· ¼ tsp salt
Directions:
Preheat oven to 400 degrees.
You will need a 6 or 7-inch spring form pan. Line it with parchment paper with the edges sticking out above the pan.
Mix the cream cheese with the sugar. Then add eggs and mix again thoroughly. Pour in the cream and sprinkle in the salt and vanilla extract. Toss in the flour and mix again.
Pour batter into the spring form pan. Place a baking sheet underneath. Bake for about 60 minutes. Oven times may vary. Check cheesecake at the 50-55 minute mark just in case. The cheesecake should be slightly jiggly in the middle and burnt on top. My oven requires me to bake things a little longer. I actually had to broil it for a few minutes to get the burnt crust and then I accidentally sort of overburnt it a little. Thankfully, this recipes allows room for that and it turned out okay! Hopefully, your oven won’t require you to do that! Let cool for about an hour before serving and then refrigerate the leftovers.
P.S. What dessert should I try making next?


The Perfect Pumpkin Tart
Typically, pie is not my favorite dessert with the exception of pumpkin pie. A pumpkin tart is even better because it has the perfect ratio of filling and crust. Most pumpkin pies or tarts tend to be a little too sweet for me. Because it’s the holiday season, I thought I’d try making it myself. And it was so easy and so good!

Typically, pie is not my favorite dessert with the exception of pumpkin pie. A pumpkin tart is even better because it has the perfect ratio of filling and crust. Most pumpkin pies or tarts tend to be a little too sweet for me. Because it’s the holiday season, I thought I’d try making it myself. And it was so easy and so good! I was actually impressed with myself. Lol. It’s probably one of the best pumpkin tarts I’ve had in my humble opinion :) Give it a shot and let me know what you think!
THE PERFECT PUMPKIN TART
INGREDIENTS:
CRUST
· 1 cracker sleeve of graham crackers (9 cracker sheets)
· 6 tbsp butter
· 1 tbsp sugar
· Pinch of salt
FILLING
· 1 can of pumpkin puree (I prefer Libby’s)
· ½ cup + 1 tbsp brown sugar
· 3 eggs
· ½ cup heavy cream
· 1 tsp vanilla extract
· Pinch of salt
DIRECTIONS:
Preheat oven to 350 degrees.
Melt butter on stove.
Crush graham crackers in a food processor until it looks like sand. Pour into a bowl. Mix with melted butter, sugar, and salt. It will then look a little like wet sand. Add crust mixture into a nonstick removable bottom 9-inch tart pan placed on a baking sheet. Spread mixture evenly along the pan. Using the bottom of a measuring cup, flatten the crust. Set aside.
Mix the ingredients for the filling. Stir evenly. Pour over the crust in the tart pan. With the tart pan on top of the baking sheet, place in oven. Bake for 45-50 minutes at 350 degrees.
Allow to cool completely before serving. Serve with whipped cream or a scoop of vanilla bean ice cream.


Dutch Dutch Baby!
Have any of you had a dutch baby before? It’s SO good! It’s simple yet looks really impressive! I was inspired to make this dutch baby after learning how to make Yorkshire Puddings last year. The consistency and ingredients are pretty much the same. I’m more of a savory girl but this was a nice little weekend breakfast treat.
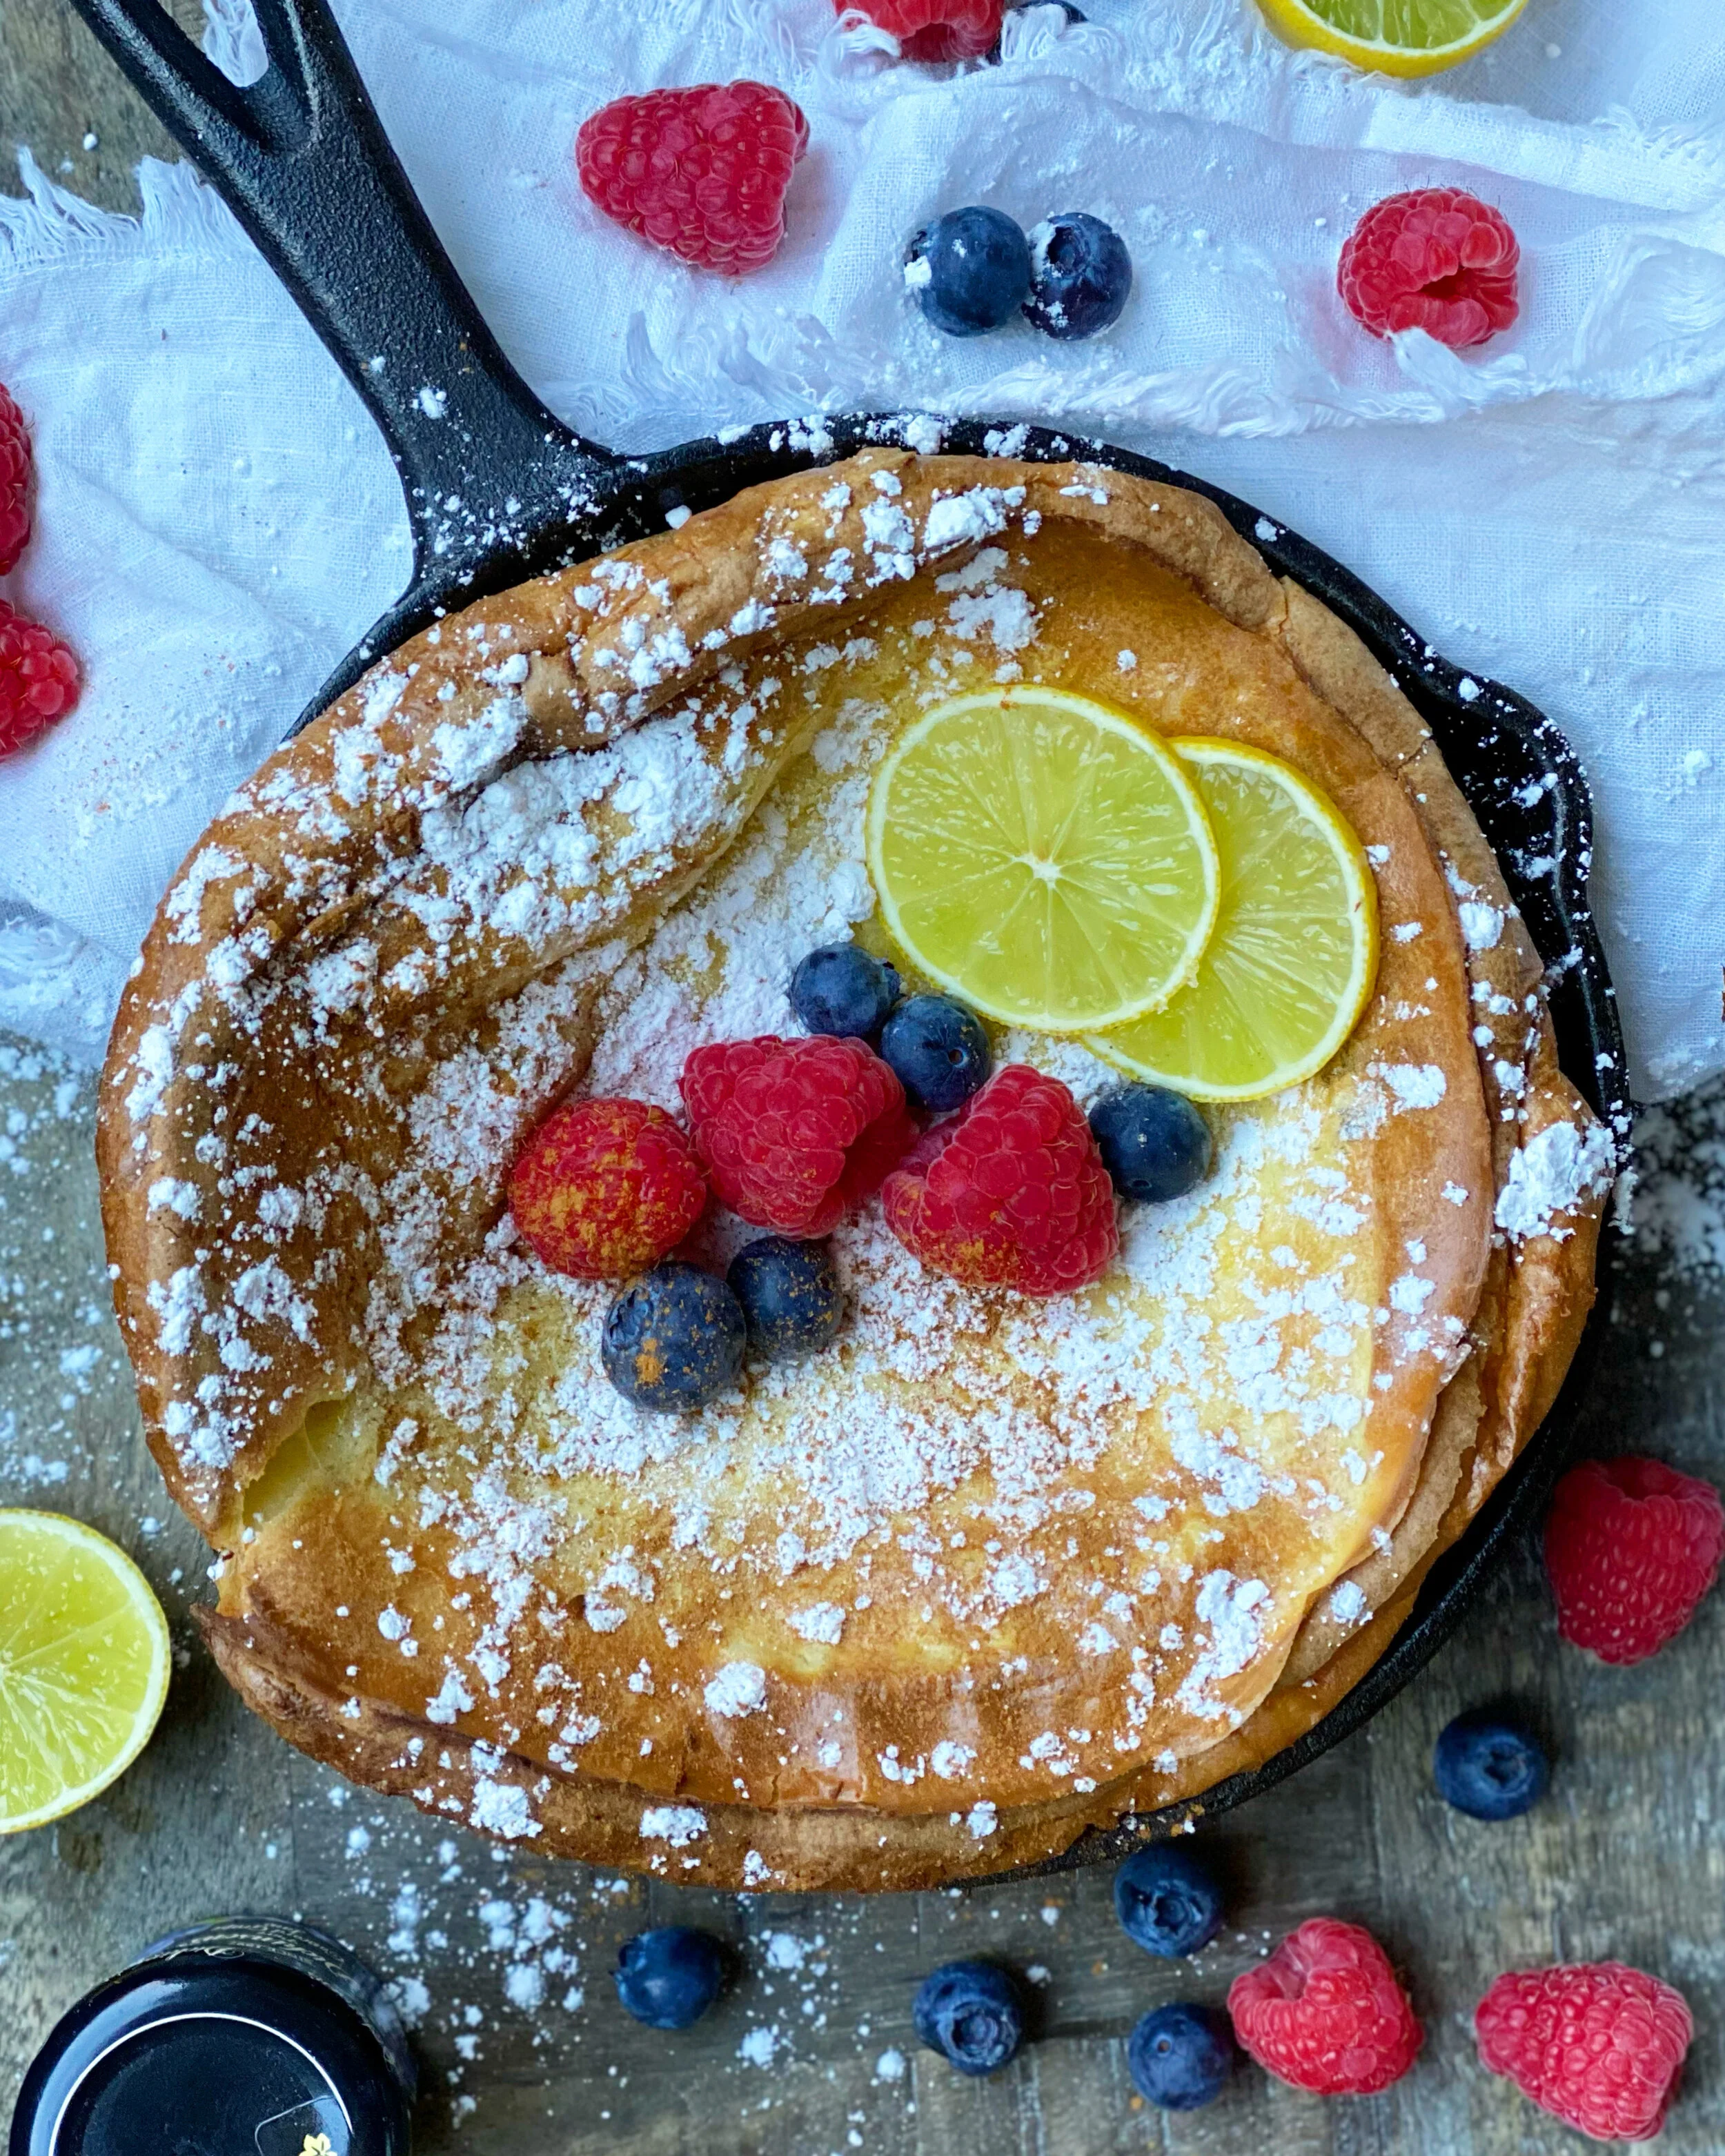
Have any of you had a dutch baby before? It’s SO good! It’s simple yet looks really impressive! I was inspired to make this dutch baby after learning how to make Yorkshire Puddings last year. The consistency and ingredients are pretty much the same. I’m more of a savory girl but this was a nice little weekend breakfast treat.
Mini Dutch Baby (Serves 2 using two small mini 6-inch cast iron skillets or one 10 or 12 inch cast iron skillet or alternatively an oven safe pan)
Ingredients:
2 eggs
½ cup of milk
½ cup of flour
½ tsp of vanilla extract
A dash of salt
1 tbsp butter or 2 tsp bacon fat, similar to Yorkshire Pudding which is my preference
toppings: maple syrup, honey, powdered sugar, jam, butter, mixed berries
Directions:
Preheat oven to 425 degrees. Meanwhile, mix eggs, milk, flour, vanilla extract, and salt. A lot of recipes include sugar. Because of all the sweet toppings that are served on top of Dutch babies, I chose to skip the sugar. Let sit at room temperature for 30 minutes.
Heat bacon fat in skillet in oven for about 5 minutes. If using butter, do the same except it should only take a minute or two. Be careful not to burn the butter. Once butter is melted, swirl it around to coat the pan.
Remove skillet from oven. Pour in batter. Return to oven and cook for about 15 to 20 minutes.
Serve with various toppings including maple syrup, honey, powdered sugar, jam, butter, and mixed berries.

Sweet Corn & Tapioca Pudding
When I think of Cambodian food, I don’t normally think of dessert. When I do finally have Cambodian dessert, I’m surprised how much I like it and wonder why I never think to make it. Dessert provides a nice ending to any meal, but it hasn’t been a priority for me in the making of this cookbook. I tend to have more of a savory palate than a sweet one. I tackled the hardest savory recipes first and I’ve saved dessert for last.

When I think of Cambodian food, I don’t normally think of dessert. When I do finally have Cambodian dessert, I’m surprised how much I like it and wonder why I never think to make it. Dessert provides a nice ending to any meal, but it hasn’t been a priority for me in the making of this cookbook. I tend to have more of a savory palate than a sweet one. I tackled the hardest savory recipes first and I’ve saved dessert for last.
This week, I made Sweet Corn & Tapioca Pudding. It was actually quite simple to make. When I posted it on Instagram last week, I was surprised by the response from my followers asking for the recipe. This dessert seemed to get more feedback than any of my savory recipes! You asked for it and here it is. Enjoy!
Sweet Corn Pudding (Serves 4-6 )
Ingredients:
3 ears of sweet corn, husks removed
1 can of coconut milk
¼ cup of tiny tapioca balls
½ cup of sugar
1 cup of water
pinch of salt
Directions:
Presoak ¼ cup of tapioca balls in a small bowl filled with cold water for 10 minutes. Mix halfway through because the balls tend to stick together. Drain any residual leftover water.
In the meantime, using a knife, shave shallow layers of the raw ears of corn. I shave about 2-3 layers of one section of the corn at a time. However, my mom prefers smaller bits of corn. She shaves more layers and scrapes the last couple of layers of corn from the cob.
In a small pot over medium heat, add 1 can of coconut milk, corn shavings, and a pinch of salt. Cook for about 10 minutes.
Pour in the tapioca balls. Cook for 5 minutes, stirring so that the balls and corn don’t stick to the bottom of the pot.
Lower heat. Pour ½ cup of sugar and 1 cup of water into the pot and stir thoroughly. Cook for 10 more minutes.
Try the pudding to see if it is sweet enough for your taste. I prefer it to be mildly sweet but you can add more sugar if you like.
Garnish with mint. Serve warm or refrigerate and serve cold.
